Friday, July 31, 2009

2 Page Bo Bunny Layout

I wanted to share this 2 page Layout that I created using Bo Bunny's Splendor line. It is one of my favorite lines. Who would have thought it would have been perfect for a "college girl" layout?! Well I guess I did!
The layout is designed as two 11x8.5 (landscape) pages stacked on top of each other. It's somewhat unique in that way - and I love that about it! I created the title in MS Word using text boxes and then just added a jewel to it.


Tuesday, July 28, 2009

Bo Bunny Birthday Sketch

Bo Bunny is having a Birthday Card Sketch Challenge on their blog. I'm always up for a challenge! So I whipped up a card.


Here is the sketch by Dee Gallimore-Perry:

Here is the front of my card. I used the Popsicle line, Double Dot and Flirty stickers. It's amazing how well you can pull from 3 different lines and have it come together so well!


And here is the inside of my card:

Maui Memories

This project was one of the most fun I've ever made! It's entirely made of Bo Bunny product... and everything on it was handmade. The tin is a Peppermint Bark container from Christmas (don't you love recycling old items?!).


I sketched the palm trees and then just cut them out. They are lifted with 3D adhesive tape (although it's hard to tell in the photo). The waves are glittered lightly. For the beach ball, pail and shovel, I used patterns from Scapbooks Etc. and paper pieced them. I cut the starfish by hand. Outlining (or inking) the paper pieced items really gives them a "finished" look.

The titles were cut with my Wishblade - what a wonderful tool!

Here is a side view of the tin.


You're My Sunshine

This is a special layout about my special someone... of course my hubby! He is indeed my sunshine on my cloudy days! This year we celebrate 15 years of happiness and I truly love him more today than ever!


This layout features the Bo Bunny Abbey Road line... it's a beautiful line and I love the jewels and the chipboard frames and flourishes. I outlined the Bo Bunny alpha with an aqua Sharpie Marker.


Sunday, July 26, 2009

Bo Bunny + Stamping = FABULOUS


Here is a layout that showcases an older (but one of my favorite) Bo Bunny lines called Splendor. I combined some stamping that I embossed. Then I colored the stamping in with multiple colors of Prismacolor Colored Pencils.

To blend the colored pencils and give them more of a "watercolor" look I used a product called Gamsol which breaks down the wax in the pencils and blends them beautifully. After stamping the image and coloring it, I cut the image into a strip and used it on my Layout.

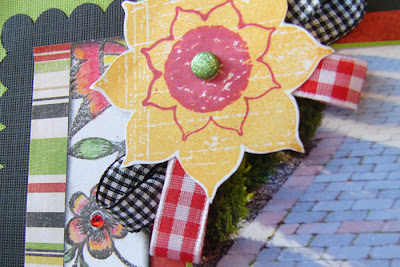
I also stamped the yelow flowers, then stamped another red image on top of the yellow one to give it a two toned effect. I added a glittered brad to the center and ribbon leaves for pizzazz.
The final touch was to "lift" the wallet sized photo using 3D adhesive tape to give it some extra presences on the layout. It nestles nicely on the Bo Bunny diecut.


Wednesday, July 22, 2009

Smiles that Melt Your Heart

One more layout made with the Bo Bunny Flirty line... and one of my all time favorite pictures! These are the smiles that definitely melt my heart everytime! Thanks to Bo Bunny who made this layout just come together in a flash... the patterned papers were just perfect!


Lil' Miss

Here's a layout I created using the Bo Bunny Flirty Patterned Paper. It's so perfect for a little girl layout! I used my exacto knife to carefuly cut around some of the images on the patterned paper (the edges of the hearts and birds) so that they could lay right over the photo. Isn't that a fun effect?